
Ok, so you found my recipe for the ultimate kale salad, but maybe you still find yourself a little intimidated by kale. If this describes you, look no further because this post will tell you everything you need to know about kale.
Let’s debunk kale myths: It’s less intimidating than it looks!
I get it, kale can be kind of intimidating. What type of kale should you get? And once you get it home, how do you store it and clean it? It looks so rough in texture, how could I possibly ever want to eat it? Don’t worry, I’ve got you covered.
Kale Tips
- Shopping for kale
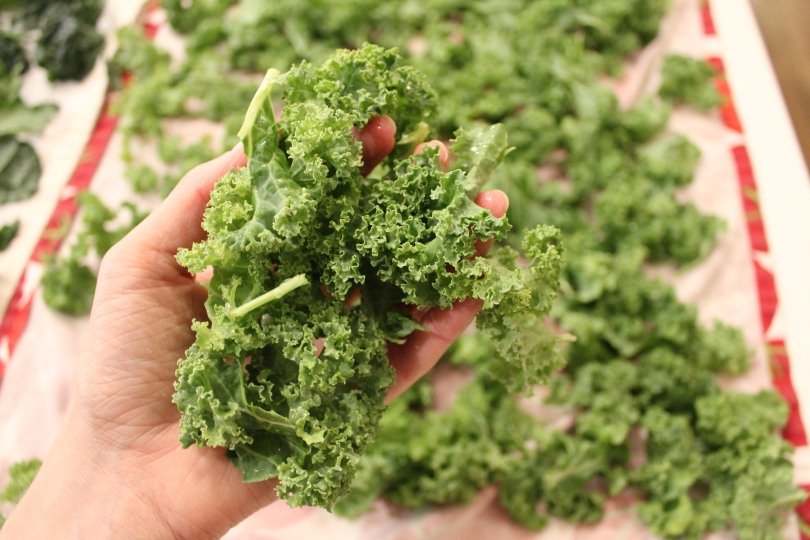
- There are two main types of kale that you might see in the grocery store: curly kale, and dino kale. The curly kale is what you’ll find most often – it has the very curly edges and looks quite rough and intimidating. Sometimes you might find red kale, which is a red version of the curly kale. The dino kale (also known as lacinato kale or Tuscan kale) has matte, smoother, darker leaves and, quite frankly, kind of looks like dinosaur skin. It’s also a little spongey.
- I tend to buy exclusively curly kale, partly because it’s more readily available, but also because it has more body than the dino kale does, which can fall flat in some dishes. Both types of kale work in my ultimate kale salad, but it’s best when made with with curly kale.
- In my opinion, the dino kale can be a little more bitter, so if the bitter taste of kale turns you off, opt for the curly kale.
- What about pre-washed kale? In the section of the grocery store with the salad leaves stored in a clamshell packaging, you may find prewashed baby kale leaves. Baby kale really is a different texture than mature kale. The unwashed mature kale will hold up better to my ultimate kale salad, and is much cheaper than the prewashed baby kale leaves. But hey, if the only way you’ll eat kale is if you don’t have to wash it, then yeah, go for it! Buy those prewashed leaves! But I’ll stick to my mature kale leaves for now.

- Washing kale
- I wash my kale as soon as I get home from the grocery store, or as soon as possible after purchasing it. It takes a bit of time to clean, so I like to clean it done all at once and then I have kale ready to use all week.
- To clean, take each leaf of kale and tear out the thick rib so only the leaves are left. Don’t worry if you tear it into pieces while removing the rib, because you’re going to do that anyway.
- Tear the kale leaves into bite-sized pieces (approximately 2 inches), and pile into the inner strainer of a salad spinner. Once full, put the inner strainer into the salad spinner, and fill the entire salad spinner bowl with water. Using your hands, swish the kale leaves around in the water, gently massaging to remove any dirt from the leaves. Let the salad soak in the leaves for a few minutes to give the dirt time to settle. Then, lift up the inner strainer and let all the water drain out into the bowl below. You’ll likely see dirt and gunk in the bottom of the salad spinner bowl that came off your kale. If necessary, repeat with 2 or 3 rinses in the same manner until the water is clear of silt and dirt.
- Empty the water from the salad spinner bowl, and put the strainer piece back into the spinner bowl. Place the spinner lid on, and spin salad to help fling the water off the leaves. After the first spin, I recommend taking the lid off, repositioning the kale, and doing a few more spins.
- The spinner won’t remove all the water from the leaves, so next, dump kale out onto single layer on a clean tea towel, and let air dry for about 30 minutes. If you are in a hurry, you can pat the kale dry gently with a second tea towel. Kale should be fully dry before storing.

- Storing kale
- I may have an unconventional method for storing kale, but it works for me, so let’s chat about it.
- A few years ago I invested in a collection Stasher bags, reusable silicone zipper bags. I’ve historically used their half-gallon size, which used to be their largest size, but they recently started making a Mega size, which is almost a full gallon. These are my go-to storage solutions for my kale. If you don’t have reusable bags, regular ziploc bags work too! But the stasher bags (especially the mega size!) are so great, I definitely recommend investing in one or two.
- In the bottom of a large zipper bag, I place a half of a paper towel. On top of the paper towel, I layer in the washed and dried kale. Once I’ve filled the bag halfway full, I add another paper towel layer. The reason for the paper towel is that it will soak up any moisture that you didn’t quite get out of the kale while air-drying, or any that may develop in the bag while it’s in the fridge. I continue to fill the bag with kale. Once full, I place one more paper towel on top. I fully close the zipper on the bag and store it in my crisper drawer. The kale leaves will last a full week when prepped in this manner. The paper towels absorb any moisture that might build up in there. During the week, if you open the bag and find that your paper towels are moist, swap them out with fresh ones.
- Kale is a hardy vegetable, so it lasts well in the fridge, longer than other, more delicate greens.

- Cooking with kale
- I tend to do grocery shopping once per week, and kale is a staple that is in my online grocery cart every week without fail. It’s more versatile than you think. But one rule of thumb to keep in mind is that kale needs to be transformed in some way before you eat it. If you don’t transform it, it can feel scratchy, tough, and dry. But once you transform it, it’s magical.
- Kale transformation can happen with either heat or friction.
- HEAT: Kale will wilt down and get more pliable as you cook it. Try it by popping some leaves into a ground turkey skillet; you can scramble it up with your eggs; or maybe you can throw some leaves into your finished tuscan soup to add some color and body.
- FRICTION: Of course, friction can help break down the kale fibers and transform it into something yummy. My husband uses it in his morning green smoothies – he places the kale at the bottom of the blender then adds liquids and frozen fruit on top, and blends it until smooth. Another way to use friction in your favor is to massage the kale with salt and lemon juice, as I do in my ultimate kale salad, which is my favorite easy side dish.

Kale: Demystified?
So as it turns out, kale isn’t that scary after all! If you have struggled with kale in the past, I hope this post gives you the confidence you need to try it out more in your own cooking.

[…] cups of washed and dried kale leaves – see this post for everything you need to know about buying, cleaning, and storing […]
LikeLike
Whoa, mega Stasher bags? I had no idea those existed. I’ll have to snag some.
I do similar prep for kale, but I just store my kale in the salad spinner in the fridge. It’s like its own little crisper drawer. I keep it in the inner strainer part so it’s not sitting in any water that accumulates. Works very well.
I also don’t like dino kale as much, and I think you get less of it in a bunch for the same price as curly kale.
LikeLike
I think the mega bags are new! I’m obsessed, definitely go look for one – they have a flat bottom so they stand up too, which is nice. I love the idea of just storing it in the salad spinner! My mind is blown. That’s such a good idea. I will try that next week and report back!
LikeLike